| Repairs and modifications made on the drive train on my Alfetta QO | ||||||||
| The original engine hasn't been touched, other than some needed replacements of bad wires and hoses, bit's and pieces, a set of new spark plugs, some fresh oil, oil filter etc. It runs pretty good and is very stable. I burns next to no oil, and will go anywhere between 10 - 12 km pr. liter fuel. Quite OK, considered the way I drive it. | ||||||||
| The electrics is the usual story (why even bother making everything electric when you know you can't make it work) Well, it seems that the Italians don't know their own limitations and when to say stop... | ||||||||
| The transmission is also untouched, with the usual problems in the first three gears (bad synchro's). | ||||||||
| 11-Aug-2006 | ||||||||
| The gearbox is going to be replaced as part of the engine upgrade as well. I have purchased a used gearbox from a Alfa 75 2.0 TS with slightly higher gearing in the first three gears compared to the original gearbox from the Alfetta. This TS gearbox is supplied with a limited slip differential (approx. 25%). | ||||||||
| I spent a good part of the day in "Skuderløse", a small town 60 km south of Copenhagen, with a guy from "Alfa Romeo Klub Danmark" who is an expert in fixing, among a lot of other Alfa Romeo stuff, the transaxle gearbox. The synchro rings in the first three gears has been replaced, and the shifter axle has been taken from the Alfetta in order to fit the current shifting mechanism. All parts has been examined well a look to be in a very good condition. | ||||||||
| I expect to use Tutela CAR ZC 75 SYNTH SAE 75W-80 Synthetic gear oil or Castrol SAF XJ.75W90, for the transaxle gearbox and limited slip differential. | ||||||||
 |
||||||||
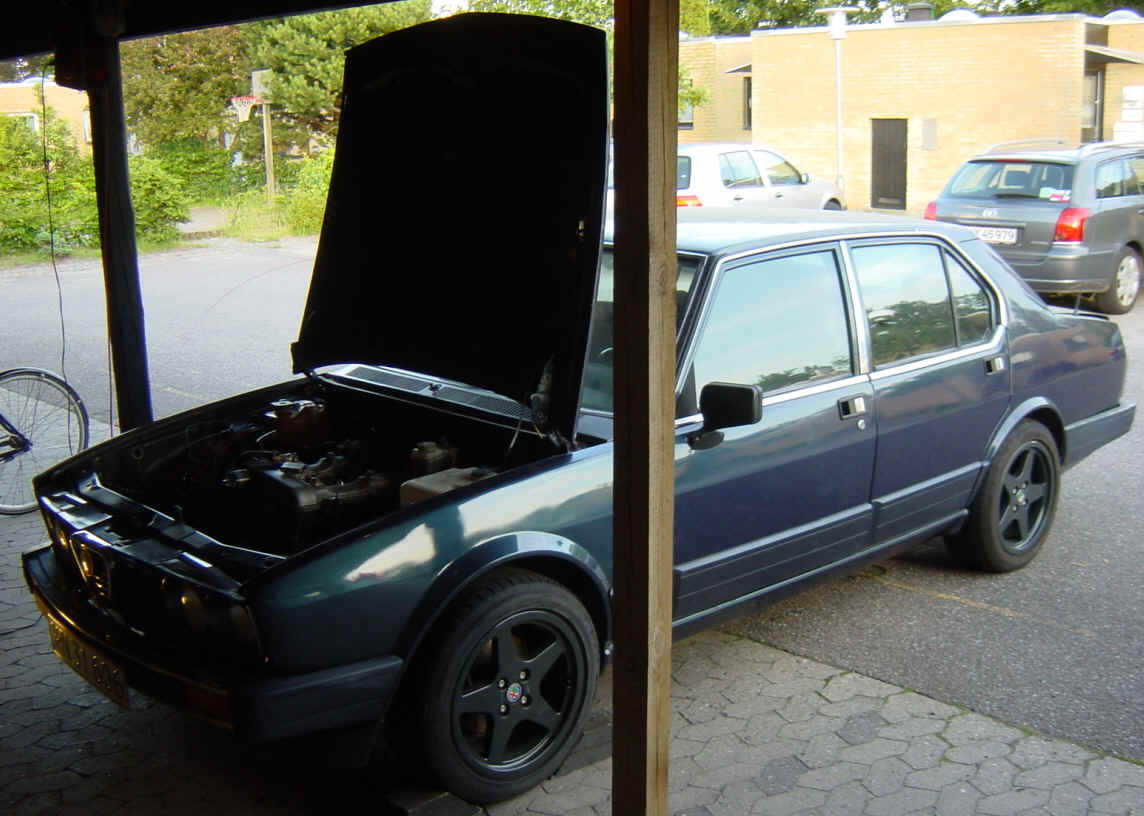
| Engine is so far original, but I have a 2.0 Twin Spark with K&N circular air filter and a tuned chip for the injection system. With this, I should have around 150 bhp out of the engine. Next step is to modify the exhaust system, firstly with a new manifold from CSC. | ||||||||
| "New" Twin spark engine from 1989, prior to dismantle, fitted on a small "trolley" for easy maneuvering around. I have bought new hoses, sparkplugs, and have the four fuel injectors ultra sonic cleaned. I don't have any plans to take the engine apart, just the exterior parts examined and cleaned. After having the engine started, I will decide whether I will (need to) spend some of my valuable time to take it apart... I hope not. | ||||||||
 |
 |
|||||||
| The used Alfa 75 TS limited transaxle gearbox, as it looked when I got it home. Unfortunately I forgot to bring my camera when I went to have it fixed. I will publish some pictures of the clutch when this is dismantled. Now the inside is almost as good as NEW ! | ||||||||
 |
Lousy picture of the original Alfa 75 TS
shifting rod going into the transaxle gearbox. Note: that this has a hole penetrating the rod rather than a spline as on the Alfetta.
|
|||||||
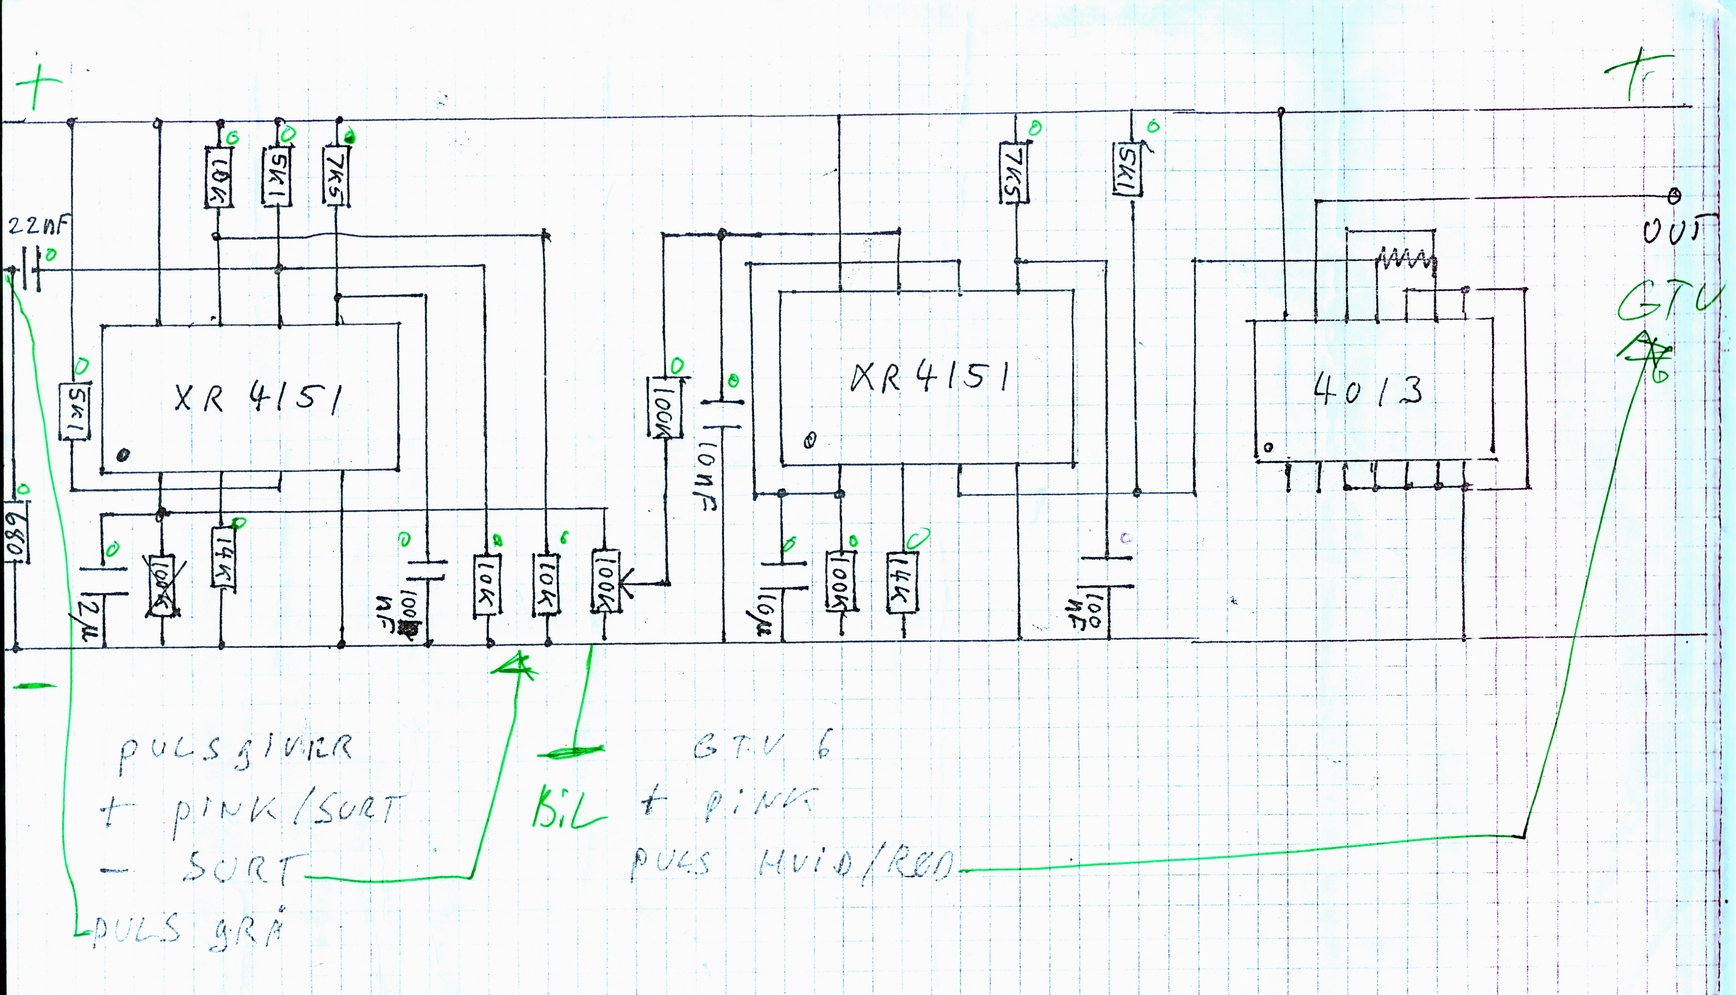
| The gearbox on the Alfetta's and the Alfa 75 TS is almost identical. However the shifting mechanism on the two cars differ from one another. The Alfa 75 TS is a shifting rod with a through hole, where as the Alfetta is a rod with splines. | Also the output signals to the speedometer is different on these vehicles. It is therefore necessary to either replace the original speedometer on the Alfetta or build a small circuit board which can change the signals and thus keeping the original Alfetta speedometer. | |||||||
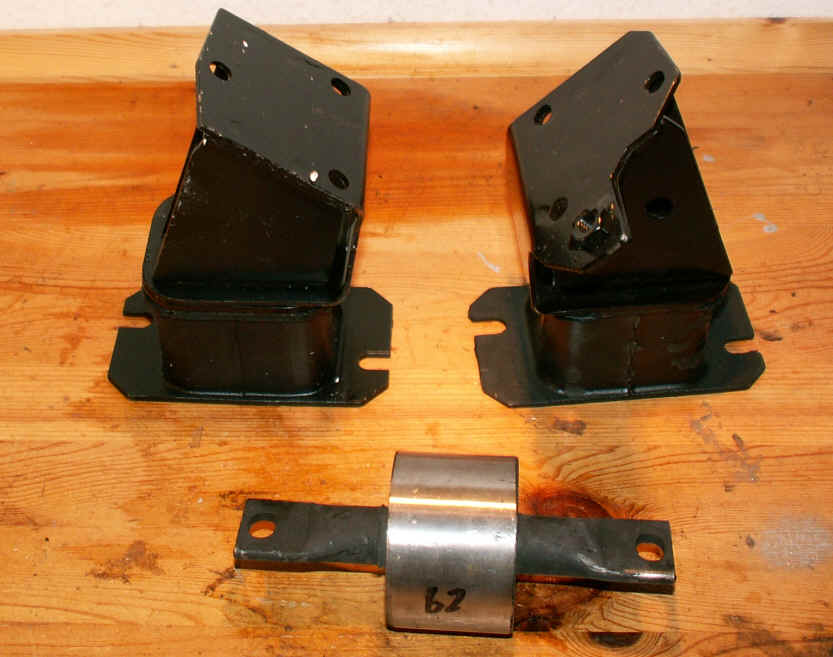
| New engine mounts, received from Highwood Alfa in the UK in August. | I have bought 3 liters of good fresh oil for the gearbox. | |||||||
|
These engine mounts has been replaced on to the "new" TS engine. The rear engine mount comes in two different dimensions: 62 mm and 64 mm. |
 |
Tutela
ZC 75 SYNTH APIGL-5 75W-80.This oil is made for use with the limited
slip differential, and should, as far as I, know be among the best oils
for the Alfa Romeo transaxle gearbox. The gearbox will hold approx. 2.5 to 2.9 liters. |
||||||
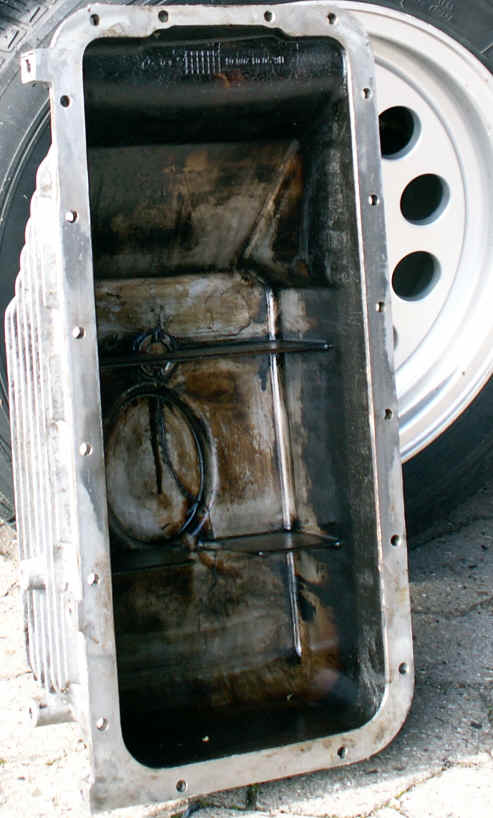
| The
TS engine was leaking oil on the floor in my shed. I assume (and HOPE!)
that the oil was coming from a poorly sealed and tightened oil pan and
engine counter flange. Both parts has been cleaned off and the oil pan has been sufficiently tightened to the engine block. |
||||||||
| Oil
pan with remains of liquid sealing.
The oil pan was far from sufficient tightened to the engine counter flange. New liquid sealing has been applied to the cleaned oil pan, and this has been attached to engine and tightened thoroughly! |
Neat
and clean oil, ready to be installed |
Engine
hanging in my shed, seen from below, with neatly cleaned counter flange. |
||||||
 |
 |
|||||||
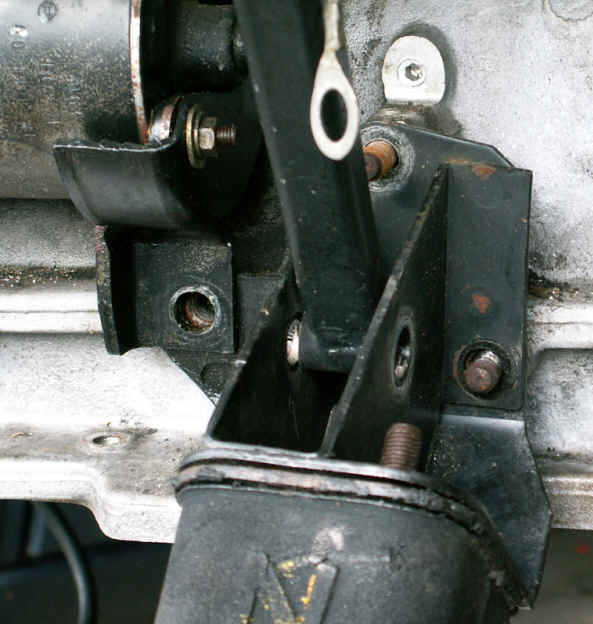 One of the "funny" things when you have to replace the right hand side engine mount. The supporting bracket of the inlet manifold is placed solid between the two flanges of the engine mount, making it virtually impossible to replace the engine mount with out also dissembling the inlet manifold from its position. I HATE IT, when they do such stupid things! Instead of five minutes work, it takes an hour or so to replace one god damn engine mount! |

Even
the starter motor is placed in such a way that it needs to be
dissembled |
|||||||
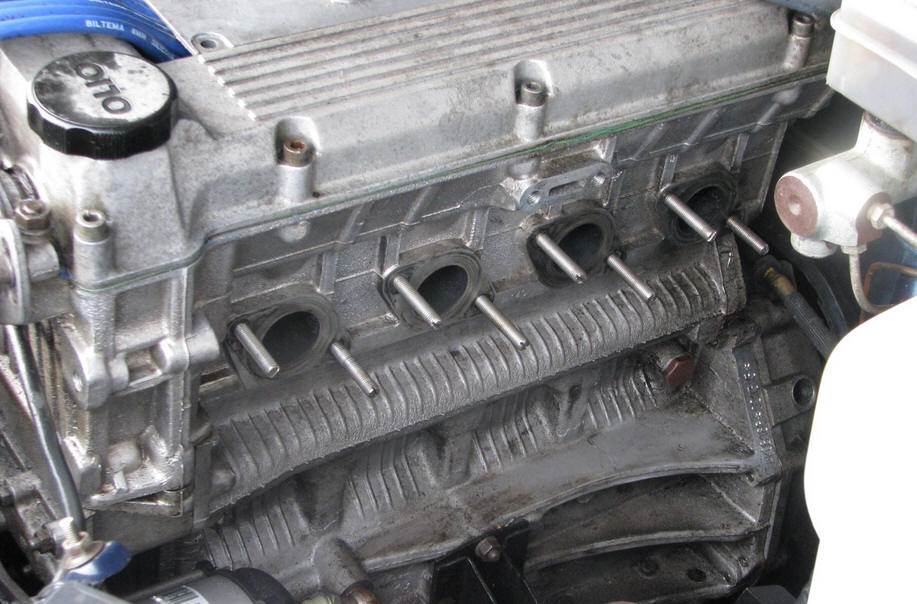
| Exhaust
flanges cleaned, and pre fitted with new cobber M8 nuts. The cobber nuts should self tighten against the threaded rod when everything is heated up by the exhaust gases. |
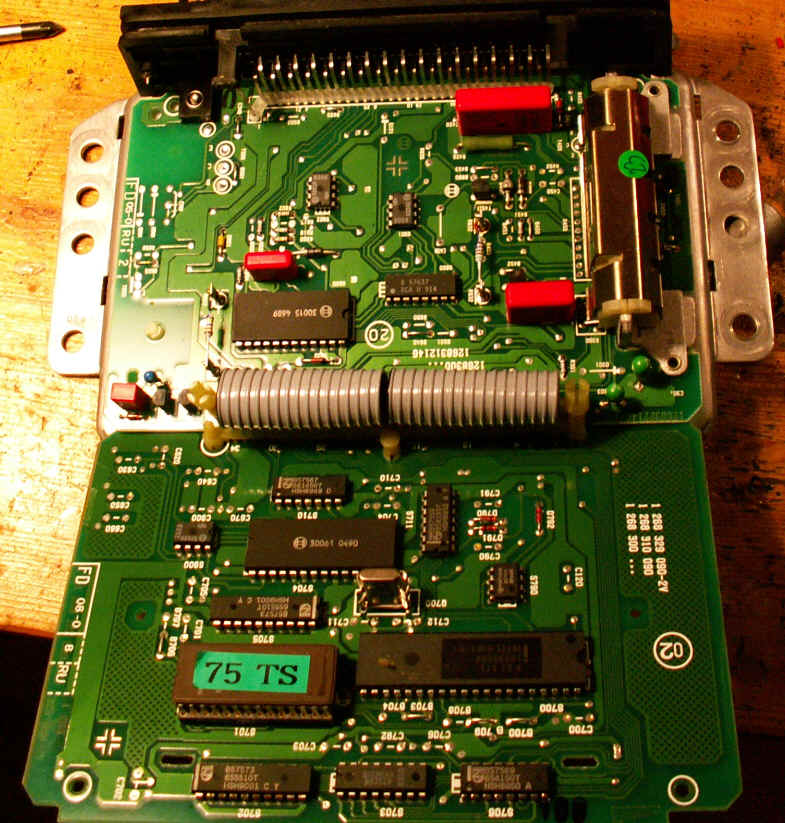
The interior part of the BOSCH Motronic ECU. I think (and hope) this one has been fitted with a modified chip, for improved performance. | |||||||
 |
|
|||||||
 |
Rear cross member and rear anti sway bar removed from the car prior to cleaning and painting. There is hardly no rust! All could be removed using my drilling machine together with a rotating steel brush. | |||||||
| All the parts has been thoroughly cleaned and painted with proper Deltron primer and Deltron PPG 2-component auto paint. | Triangle and rear cross member fitted to the gearbox, just waiting to be attached to the car again! | |||||||
 |
 |
|||||||
| The transmission and triangle back in it original position. | The bottom of the car is real healthy, only minor surface rust. All has been cleaned, painted, and sprayed with to layers of Tectyl (thin and thick). | |||||||
 |
 |
|||||||
|
|
Removing
the engine. Neat feature, being able to open the bonnet to more than vertical position, by simply removing a couple of bolt on either side of the mounting brackets!!! This really gives you good working space. Only tricky part is to get the rear aluminum bracket (bell mounting) out of the car without making too many scratches during this process. |
|||||||
|
Ready to lift off !!! |
And out it came - it was really no big deal |
|||||||
 |
 |
|||||||
|
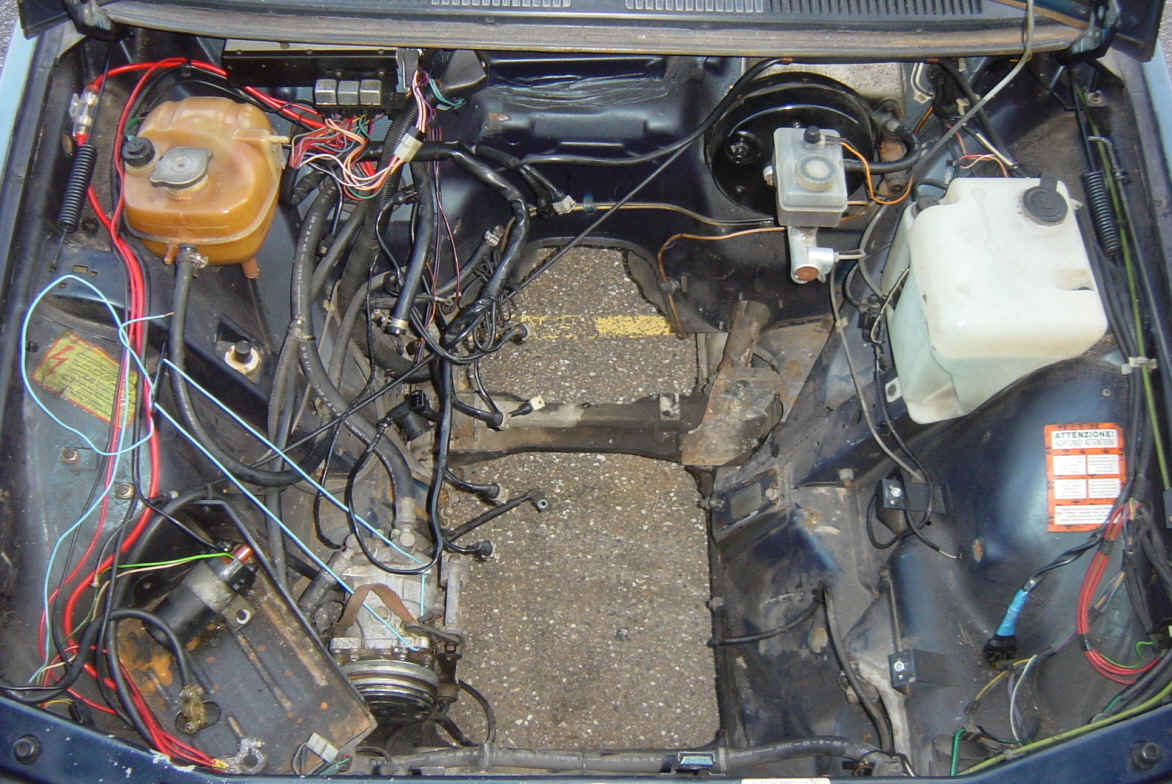
Next step - Cleaning
the engine compartment. |
||||||||
|
|
||||||||
| Gear lever and heat shields from the engine compartment, painted and waiting patiently in line to be installed... | Transaxle painted as well and also laying in line ready to connecting the renovated gearbox and Twin Spark engine. | |||||||
 |
||||||||
|
FINALLY!!! The engine is bolted to the body. The engine compartment has been cleaned thoroughly, and was spot painted in the original color and a fresh layer of clear paint. |
||||||||
|
|
||||||||
| I still miss to replace the cooler, the and the corresponding hoses, as well as all the wiring, the battery and a couple of other items. | ||||||||
| One
of the tings you things you have to remember when replacing the original
gearbox with a gearbox from e.g. a 75 TS is that the speedometer reading
from the gearbox is different, and you need to either fabricate a print card
which is capable of transforming the signals to match those of the
speedometer. I have been told a couple of
different ways to handle this, but have not tried any yet. I will follow
up on this later.
Here are some clues and ideas:
Update August 2009. I have acquired a complete set of used parts from an old 75 TS, consisting sensor, interface module and speedometer. I made sure to note where the wires came from an two, replaced the speedometer from the TS into the dashboard of my Alfetta (replacing only the speedometer and keeping the other original instruments). |
||||||||
 |
This is how my original dashboard looked prior to
shifting the speedometer. Note the green lines, where as the speedometer from the 75 TS I dismantled is white - too bad. But most importantly IT WORKS!  |
|||||||
| The
battery need to be moved to the opposite side of the engine bay because the
air intake of the TS engine is opposite to the original Nord Engine.
I have cut a piece out of the bracket for the main battery, and welded it together again in order to make it shorter (smaller battery = less weight). Then welded three 10 mm bolts to the bottom of the bracket, these bolts are then securely fixed with washers and nuts to the car through three corresponding holes. |
||||||||
| The ignition coils are fixed vertically on the Alfa 75 TS behind the right headlight. I have placed them flat on the inner right front wing on a rectangular piece of aluminum. I need some space for improving the fresh air flow to the intake filter. | ||||||||
|
The wiring between the Alfetta and the TS engine gave me some good
headaches, but the problems were solved with help from a friend who also
suffers from "Alfisti". I had problems getting sparks on the sparkplugs.
My fellow Alfisti friend
(electrical engineer) came by, and found out that one of the three main
relays was broken and I had connected the wiring to the coal filter to
the ignition coils. It took us 2-3 hours to identify the problems and
rectify, and now everything
is in perfect order... I still have some loose ends here and there, but all essential wire are connected and I have the fuel pumps running and sparks in the sparkplugs. Unfortunately my fuel injectors was also out of order (probably due to oxidation of the internal parts after years of storage). I have bought four new (expensive) BOSCH fuel injectors, spend ½ hour to replace the old ones, turned the key in the ignition, 5-6 revolutions of the engine and it came ALIVE. The engine spins like a CAT - YEHAAAA. This car is so much FUN now. It accelerates like never before, man this is FUN!!! |
||||||||
|
|
||||||||
| In the everlasting
quest for more power I have purchased a CSC manifold for the TS engine.
This should increase power by approx. 5 HP and give an 5 % increase in
torque. I have no idea whether this is true or not. I cannot feel the
difference only hear it
|
||||||||
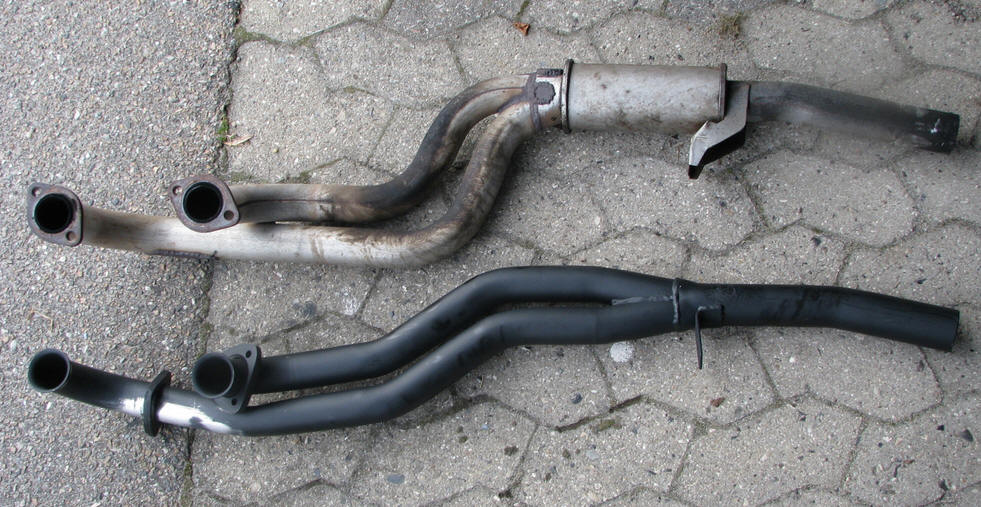
| The diameter and the lengths of the individual tubing is adjusted to suit the TS engine in order to give the increase in power. The new manifold internal diameter is 37 mm compared to the original 32 m. This corresponds to a 25 - 30 % larger area (and then it weighs 5-6 kg less than the original exhaust). | ||||||||
| Enjoy the pictures: | ||||||||
 |
 |
|||||||
|
Note the little sticker of the spoke of the wheel - Nice eh? |
Going from heavy small diameter cast iron manifold to large diameter light weight tubing |
|||||||
|
|
|
|||||||
| Before... | ...Midway... | ...After | ||||||
 |
 |
 |
||||||
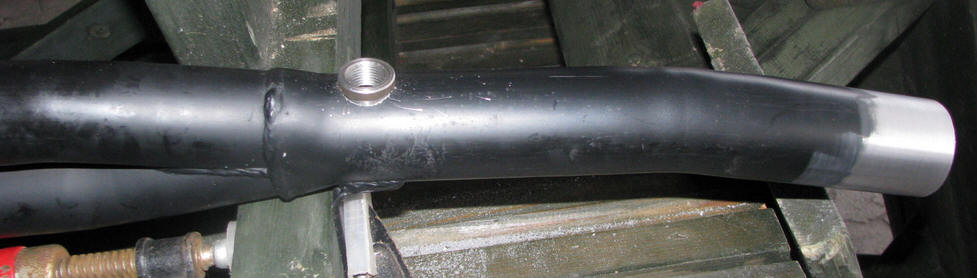
| Preparing the threaded piece for the lambda probe, just need a little welding | ||||||||
|
|
||||||||
| Home to Repair main page | ||||||||


